图片数据集自动生成与标注算法
前言
之前写过一篇文章,讲的是自动标注,今天对这个程序做了一些改进,使其适应更多情况,并且重写了注释和部分函数,增加一些自定义功能
这个程序可以根据一张图片进行各种随机处理生成无数个图片的数据集,并且使用voc格式自动进行标注,节省大量人力和时间
2023.2.9更新:增加了yolo和voc输出的选择,增加了数据集数量控制,优化已有代码,加入了简介。
github仓库:photo_data_maker,点个star谢谢你qwq
一部分细节内容位于博客的另一篇文章
简介
程序用于自动生成用于神经网络视觉识别的训练数据集,也可以生成两次分别作为数据集和验证集。
实现原理
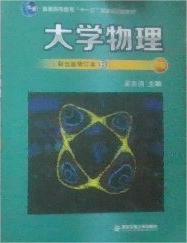
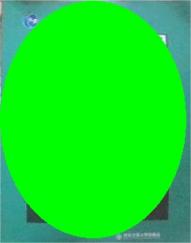
首先裁剪出几张需要识别的物体的图片,然后使用绿色圆圈对其进行标注,再选择一堆背景图片作为生成数据的背景,越多样越好。
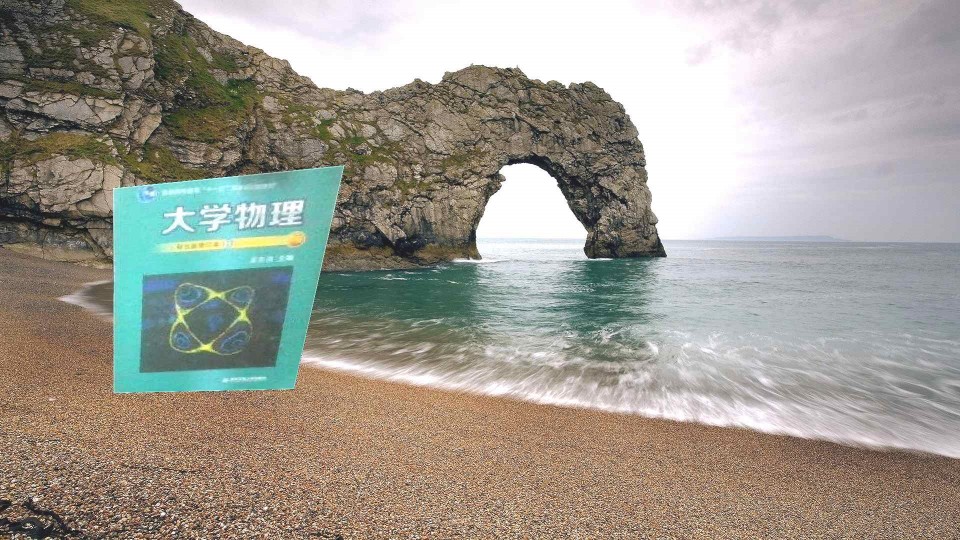
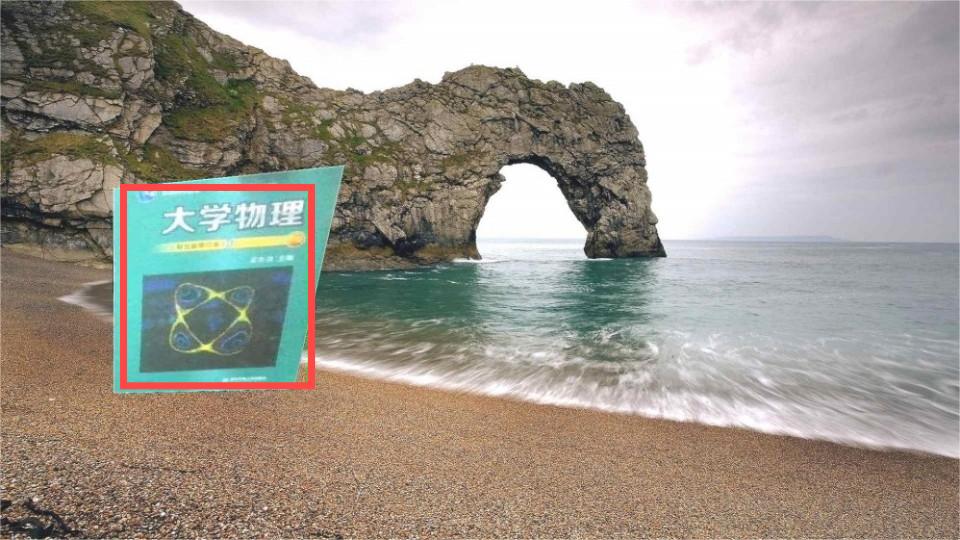
遍历文件夹读取图片,模仿现实环境对图片进行随机变换,如亮度加减,对比度加减,模糊,以及视角变化的透视变换,得到一个扭曲的图像,将其叠加在背景图片上,即可得到数据集图片。再用一样的变换参数对标注好的图片进行变换,但是这次图片有绿色(255,0,0)标注,直接选取标注区域的最小外接矩形即可得到目标位置。
图像输入及输出示例:
| 原图 | 标注图 | 输出图片 | 标注可视化 |
|---|---|---|---|
 |
 |
 |
 |
经过实际测试,在数据生成参数合适的情况下,对于输入物体检测的成功率大于99%,受极限角度,特殊光照环境等干扰影响极小。
文件路径
1 | project |
images内存放各个种类图片的文件夹,这些图片的种类即为文件夹名称。images_marked存放标注文件的文件夹,标注文件种类名称即为文件夹名称。backs文件夹存放所有的背景图片output输出,images是数据图片,images_marked是提供参考的标注的图片,labels是标注文件。代码
auto_marking.py
1
2
3
4
5
6
7
8
9
10
11
12
13
14
15
16
17
18
19
20
21
22
23
24
25
26
27
28
29
30
31
32
33
34
35
36
37
38
39
40
41
42
43
44
45
46
47
48
49
50
51
52
53
54
55
56
57
58
59
60
61
62
63
64
65
66
67
68
69
70
71
72
73
74
75
76
77
78
79
80
81
82
83
84
85
86import traceback
from funcs import *
from txt_output import *
import os
import multiprocessing
total = 100000
processes = 16
def data_marker(img, img_marked, back):
# 亮度,可自定义参数
img = random_brightness(img)
back = random_brightness(back)
# 缩放,可自定义参数
r = random.randint(5, 40) / 10
img = cv2.resize(img, (0, 0), fx=r, fy=r, interpolation=cv2.INTER_NEAREST)
img_marked = cv2.resize(img_marked, (0, 0), fx=r, fy=r, interpolation=cv2.INTER_NEAREST)
# 透视变换,可自定义参数
img, points = random_perspective(img, 0.25, 0, 0)
# 模糊
# img = random_blur(img)
# copy透视处理
xc, yc, wc, hc = points_perspective(img_marked, points)
# 叠加
back, x, y = overlay(img, back)
xmin, ymin = (x + xc, y + yc)
xmax, ymax = (x + xc + wc, y + yc + hc)
# cv2.rectangle(back, (xmin, ymin), (xmax, ymax), (0, 255, 0), 2)
return back, xmin, ymin, xmax, ymax
def data_maker(a, pro):
try:
m = 0
objs = os.listdir('auto_marking/images')
backs = os.listdir('auto_marking/backs')
data_format = 'yolo'
while m < pro:
for k in objs:
imgs = os.listdir('auto_marking/images/'+k)
for i in imgs:
img = cv2.imread('auto_marking/images/' + k + '/' + i)
img_marked = cv2.imread('auto_marking/images_marked/' + k + '/' + i)
for j in backs:
if m > pro:
break
m += 1
print(m)
s = str(m) + str(a)
back = cv2.imread('auto_marking/backs/' + j)
data_output, xmin, ymin, xmax, ymax = data_marker(img, img_marked, back)
cv2.imwrite("auto_marking/output/images/" + k + '/' + s + '.jpg', data_output)
cv2.rectangle(data_output, (xmin, ymin), (xmax, ymax), (0, 255, 0), 2)
cv2.imwrite("auto_marking/output/images_marked/" + k + '/' + s + '.jpg', data_output)
if data_format == 'voc':
picture_width = back.shape[1]
picture_height = back.shape[0]
txt = voc_xml_maker(s + '.jpg', xmin, ymin, xmax, ymax, k, picture_width, picture_height)
label_name = s + '.xml'
elif data_format == 'yolo':
y, x, n = data_output.shape
txt = yolo_txt_maker(objs.index(k), xmin, ymin, xmax, ymax, x, y)
label_name = s + '.txt'
else:
raise Exception('wrong label_name')
path = 'auto_marking/output/labels/' + k + '/' + label_name
fw = open(path, 'w')
fw.write(txt)
fw.close()
#print(s)
except (Exception, BaseException) as e:
exstr = traceback.format_exc()
print(exstr)
if __name__ == "__main__":
pl = multiprocessing.Manager().Lock()
pool = multiprocessing.Pool(processes)
per = int(total/processes)
for i in range(processes):
pool.apply_async(data_maker, args=(str(i), per))
pool.close()
pool.join()
print("Sub-process(es) done.")func.py
1
2
3
4
5
6
7
8
9
10
11
12
13
14
15
16
17
18
19
20
21
22
23
24
25
26
27
28
29
30
31
32
33
34
35
36
37
38
39
40
41
42
43
44
45
46
47
48
49
50
51
52
53
54
55
56
57
58
59
60
61
62
63
64
65
66
67
68
69
70
71
72
73
74
75
76
77
78
79
80
81
82
83
84
85
86
87
88
89
90
91
92
93
94
95
96
97
98
99
100
101
102
103
104
105
106
107
108
109
110
111
112
113
114
115
116
117
118
119
120
121
122
123
124
125
126
127
128
129
130
131
132
133
134
135
136
137
138
139
140
141
142
143
144
145
146
147
148
149
150import random
import cv2
import numpy as np
def random_brightness(img, a=30, b=30, bright_min=2, bright_max=254):
"""
亮度随机变化
:param img: 传入图像
:param a: 亮度变化倍率最大范围(0-100),默认30
:param b: 亮度变化大小最大范围(0-255),默认30
:param bright_min: 返回图像最小亮度,默认2
:param bright_max: 返回图像最大亮度,默认254
:return: 返回图像
"""
alpha = 0.01 * random.randint(-a, a) + 1
beta = random.randint(-b, b)
return np.uint8(np.clip((alpha * img + beta), bright_min, bright_max))
def random_blur(img, r=3):
"""
随机大小高斯滤波
:param img: 传入图像
:param r: 高斯滤波范围,模糊处理边长为2r+1,默认3
:return: 返回图像
"""
n = random.randint(0, r)
return cv2.blur(img, (2 * n + 1, 2 * n + 1))
def random_perspective(img, random_range=0.3, symmetry_mode=0, symmetry_direction=0):
"""
随机透视变换
:param img:传入图像
:param random_range:随机范围,默认为0.3,指每个角位置变化距离占边长百分比,应介于0-0.5
:param symmetry_mode:对称模式,默认为0,即不对称,1为左右对称,2为上下对称。
以正方形为例,对称将只会把正方形透视变换为等腰梯形,左右对称则左右两边长度相等上下两边平行,上下对称则上下两边长度相等左右两边跑平行。
:param symmetry_direction:对称方向指定,仅当开启对称情况下有效,默认为0,即不指定。
若前一参数对称模式为1即左右对称,此参数为1表示等腰梯形上窄下宽,此参数为2反之.
若前一参数对称模式为2即上下对称,此参数为1表示等腰梯形左宽右窄,此参数为2反之.
:return:透视后的图像,随机生成透视变换四个点的xy坐标的二维数组
"""
while True:
h, w, p = img.shape
w2 = int(w / 2)
h2 = int(h / 2)
if symmetry_mode == 0:
x1 = random.randint(int(random_range * w), w2)
x2 = random.randint(int((1 - random_range) * w), w)
x3 = random.randint(int(random_range * w), w2)
x4 = random.randint(int((1 - random_range) * w), w)
y1 = random.randint(int(random_range * h), h2)
y2 = random.randint(int(random_range * h), h2)
y3 = random.randint(int((1 - random_range) * h), h)
y4 = random.randint(int((1 - random_range) * h), h)
points = [[x1, y1], [x2, y2], [x3, y3], [x4, y4]]
elif symmetry_mode == 1:
x1 = random.randint(int(random_range * w), w2)
x2 = w - 1 - x1
x3 = 0
x4 = w - 1
y1 = random.randint(int(random_range * h), h2)
y2 = y1
y3 = h - 1
y4 = y3
if symmetry_direction == 1:
points = [[x1, y1], [x2, y2], [x3, y3], [x4, y4]]
elif symmetry_direction == 2:
points = [[x3, y1], [x4, y2], [x1, y3], [x2, y4]]
elif symmetry_direction == 0:
if random.choice([1, 2]) == 1:
points = [[x1, y1], [x2, y2], [x3, y3], [x4, y4]]
else:
points = [[x3, y1], [x4, y2], [x1, y3], [x2, y4]]
else:
raise Exception('symmetry_direction只应该是0/1/2')
elif symmetry_mode == 2:
x1 = 0
x2 = random.randint(int((1 - random_range) * w), w)
x3 = 0
x4 = x2
y1 = 0
y2 = random.randint(int(random_range * h), h2)
y3 = h - 1
y4 = h - 1 - y2
if symmetry_direction == 1:
points = [[x1, y1], [x2, y2], [x3, y3], [x4, y4]]
elif symmetry_direction == 2:
points = [[x1, y2], [x2, y1], [x3, y4], [x4, y3]]
elif symmetry_direction == 0:
if random.choice([1, 2]) == 1:
points = [[x1, y1], [x2, y2], [x3, y3], [x4, y4]]
else:
points = [[x1, y2], [x2, y1], [x3, y4], [x4, y3]]
else:
raise Exception('symmetry_direction只应该是0/1/2')
else:
raise Exception('symmetry_mode只应该是0/1/2')
# 凸四边形验证,不确定修改后是否依然需要,反正留着不会出错
if ((x2 - x1) * (y4 - y1) - (y2 - y1) * (x4 - x1)) * ((x3 - x1) * (y4 - y1) - (y3 - y1) * (x4 - x1)) < 0 and (
(x1 - x2) * (y3 - y2) - (y1 - y2) * (x3 - x2)) * ((x4 - x2) * (y3 - y2) - (y4 - y2) * (x3 - x2)) < 0:
break
else:
print("warning" + str(points))
pts3_d1 = np.float32([[0, 0], [w, 0], [0, h], [w, h]]) # 原图点
pts3_d2 = np.float32(points) # 随机得到的四个点
m = cv2.getPerspectiveTransform(pts3_d1, pts3_d2) # 矩阵计算
return cv2.warpPerspective(img, m, (w, h)), points
def points_perspective(img_copy, points):
"""
进行指定参数的透视变换求纯绿色的最小外接矩形
:param img_copy: 带绿色标注的图像
:param points: 透视变换参数点
:return: 所得矩形的[xc, yc, wc, hc]
"""
h, w, p = img_copy.shape
img_copy = cv2.warpPerspective(img_copy, cv2.getPerspectiveTransform(np.float32([[0, 0], [w, 0], [0, h], [w, h]]),
np.float32(points)), (w, h))
cv2.cvtColor(img_copy, cv2.COLOR_BGR2HSV)
img_copy = cv2.inRange(img_copy, np.array([0, 254, 0]), np.array([3, 255, 255]))
xc, yc, wc, hc = cv2.boundingRect(img_copy)
# cv2.rectangle(img_copy, (xc, yc), (xc + wc, yc + hc), 255, 2)
return xc, yc, wc, hc
def overlay(img, back):
"""
透视变换后的图像叠加到背景图
:param img: 透视变换后的图像
:param back: 背景图
:return: 输出图像,输入图像被放置的位置(左上xy坐标)
"""
h, w, p = back.shape
rows, cols, channels = img.shape
x = random.randint(0, round(w - cols))
y = random.randint(0, round(h - rows))
roi = back[y:rows + y, x:cols + x]
img2gray = cv2.cvtColor(img, cv2.COLOR_BGR2GRAY)
ret, mask = cv2.threshold(img2gray, 1, 255, cv2.THRESH_BINARY)
mask_inv = cv2.bitwise_not(mask)
img1_bg = cv2.bitwise_and(roi, roi, mask=mask_inv)
img2_fg = cv2.bitwise_and(img, img, mask=mask)
dst = cv2.add(img1_bg, img2_fg)
back[y:rows + y, x:cols + x] = dst
return back, x, ytxt_output.py
1
2
3
4
5
6
7
8
9
10
11
12
13
14
15
16
17
18
19
20
21
22
23
24
25
26
27
28
29
30
31
32
33
34
35
36
37
38
39
40
41
42
43
44
45
46
47
48
49
50
51
52
53
def yolo_txt_maker(index, xmin, ymin, xmax, ymax, x, y):
"""
生成yolo格式的txt文件
:param index: 类别序号
:param x: 图片宽度
:param y: 图片长度
:return: txt文件内容
"""
yolo_data = "{index} {position_x} {position_y} {width} {height}".format(
index=str(index), position_x=str((xmin + xmax) / 2 / x), position_y=str((ymin + ymax) / 2 / y)
, width=str((xmax - xmin) / x), height=str((ymax - ymin) / x))
return yolo_data
def voc_xml_maker(file_name, xmin, ymin, xmax, ymax, kind, picture_width, picture_height):
"""
生成voc格式的xml文件
:param file_name: 图片文件名
:param kind: 物品种类
:return: xml文本字符串
"""
voc_data = '''<?xml version="1.0" ?>
<annotation>
<folder>something</folder>
<filename>{file_name}</filename>
<path>{file_name}</path>
<source>
<database>Unknown</database>
</source>
<size>
<width>{picture_width}</width>
<height>{picture_height}</height>
<depth>3</depth>
</size>
<segmented>0</segmented>
<object>
<name>{kind}</name>
<pose>Unspecified</pose>
<truncated>0</truncated>
<difficult>0</difficult>
<bndbox>
<xmin>{xmin}</xmin>
<ymin>{ymin}</ymin>
<xmax>{xmax}</xmax>
<ymax>{ymax}</ymax>
</bndbox>
</object>
</annotation>
'''.format(file_name=file_name, xmin=str(xmin), ymin=str(ymin), xmax=str(xmax), ymax=str(ymax), kind=kind
, picture_width=str(picture_width), picture_height=str(picture_height))
return voc_data
本博客所有文章除特别声明外,均采用 CC BY-NC-SA 4.0 许可协议。转载请注明来自 Triority's blog!
评论